I booked my trip to Mount Kilimanjaro over a year before I set out on my journey to the summit. During that year I put a lot of my focus on training (at the gym and in the mountains) and researching the trek. I would watch YouTube videos, read other adventurer’s blogs and talk to many inspiring people who had completed the summit. You know my chatty self asked them lots of questions about their experience on the trek and how to train!
Here are some tips that I found the most useful during my climb to the summit. Even after the experience I researched even more by gathering information from the guides and employees of Trekking Hero, the company I decided to trek with. I wanted to get as much information and hear as many stories I could, in hopes of creating the perfect list of tips to help you on your endeavors. I hope these tips will help you in your journey not only to the summit of Kilimanjaro, but other mountain peaks and adventures as well!
Train for the Climb
And train like you mean it! One thing I noticed about many of the climbers on Kilimanjaro is that they had little to no prior experience trekking in the mountains or that they even trained for the journey. I was a bit shocked, but heard from the guides that it is pretty common, since a lot of companies advertise Kilimanjaro as “Everyman’s Everest.” According to these claims, anyone with a pulse could reach the summit because it’s just one long walk. Up the world’s highest freestanding mountain. That happens to stand at over 19,000 feet. Lucky for me, I knew that training would not only increase my chances of reaching the summit, but also help me enjoy the entire process.
I am lucky to be located relatively close to mountains, so I got to drive out there and hike quite a bit. When I am in California I have the Sierra Nevadas as my playground, and can usually be found hiking in the Lake Tahoe area. When I am in Canada I hike and scramble in the stunning Canadian Rockies. I also decided to go to Colorado while I was on a road trip to conquer some 14,000 foot mountains. This really helped me get used to higher altitude, and I got to utilize the hike high, sleep low method for a week. For the average person living at sea level, any hike that has elevation changes will help. But I highly recommend getting some experience in altitude to make your trek more enjoyable. As well, it will give you an idea of how your body works at altitude.
I not only walked every day, I also made it a point to go to the gym every chance I got. There, I could train on different cardio machines and utilize weight training. I wanted to have a different workout every time so I never hit a plateau. Every week I upped the intensity, time and number of reps. I also took yoga and kickboxing classes, and swam laps in the pool. Swimming and yoga help a lot with breathing techniques.
Here’s what I suggest for you: create long and short-term goals, and create a program based on your desired results. Whatever elevation you live at, get out and walk. Every day you can. Go to the gym. Put a backpack on and hit the stairmaster. Run on the treadmill. Train with weights. Train your core. Take a kickboxing class. Try yoga. Never stop challenging yourself.
Stay Positive
Climbing Kilimanjaro, like many other treks and hikes, is just as mental as it is physical. I’m sure you have already done some research (I sure did) and looked at the success rate of each trail, altitude sickness symptoms and horror stories from the people who didn’t summit. Forget other people’s stories. Focus on creating your own.
Staying positive and mentally strong before and during the trek will benefit you greatly. There is a quote that goes: “whether you think you can, or think you cannot, you are right.” Think positive thoughts while you train. Tell yourself you will reach your goals (and also tell yourself that it is ok if you are unable to due to sickness). Envision yourself at the summit. You will definitely need to be in a strong mental state on summit night, as you will be tired and quite possibly doing one of the hardest hikes in your lifetime. It is dark, steep and cold. There will be times you may want to give up. Don’t give up on yourself. Stay strong. Stay positive. Keep your mind in the present moment. Count your steps. Sing a sing. Know that you are almost there. Believe you can, and you will.
Choose the Best Trail for YOU
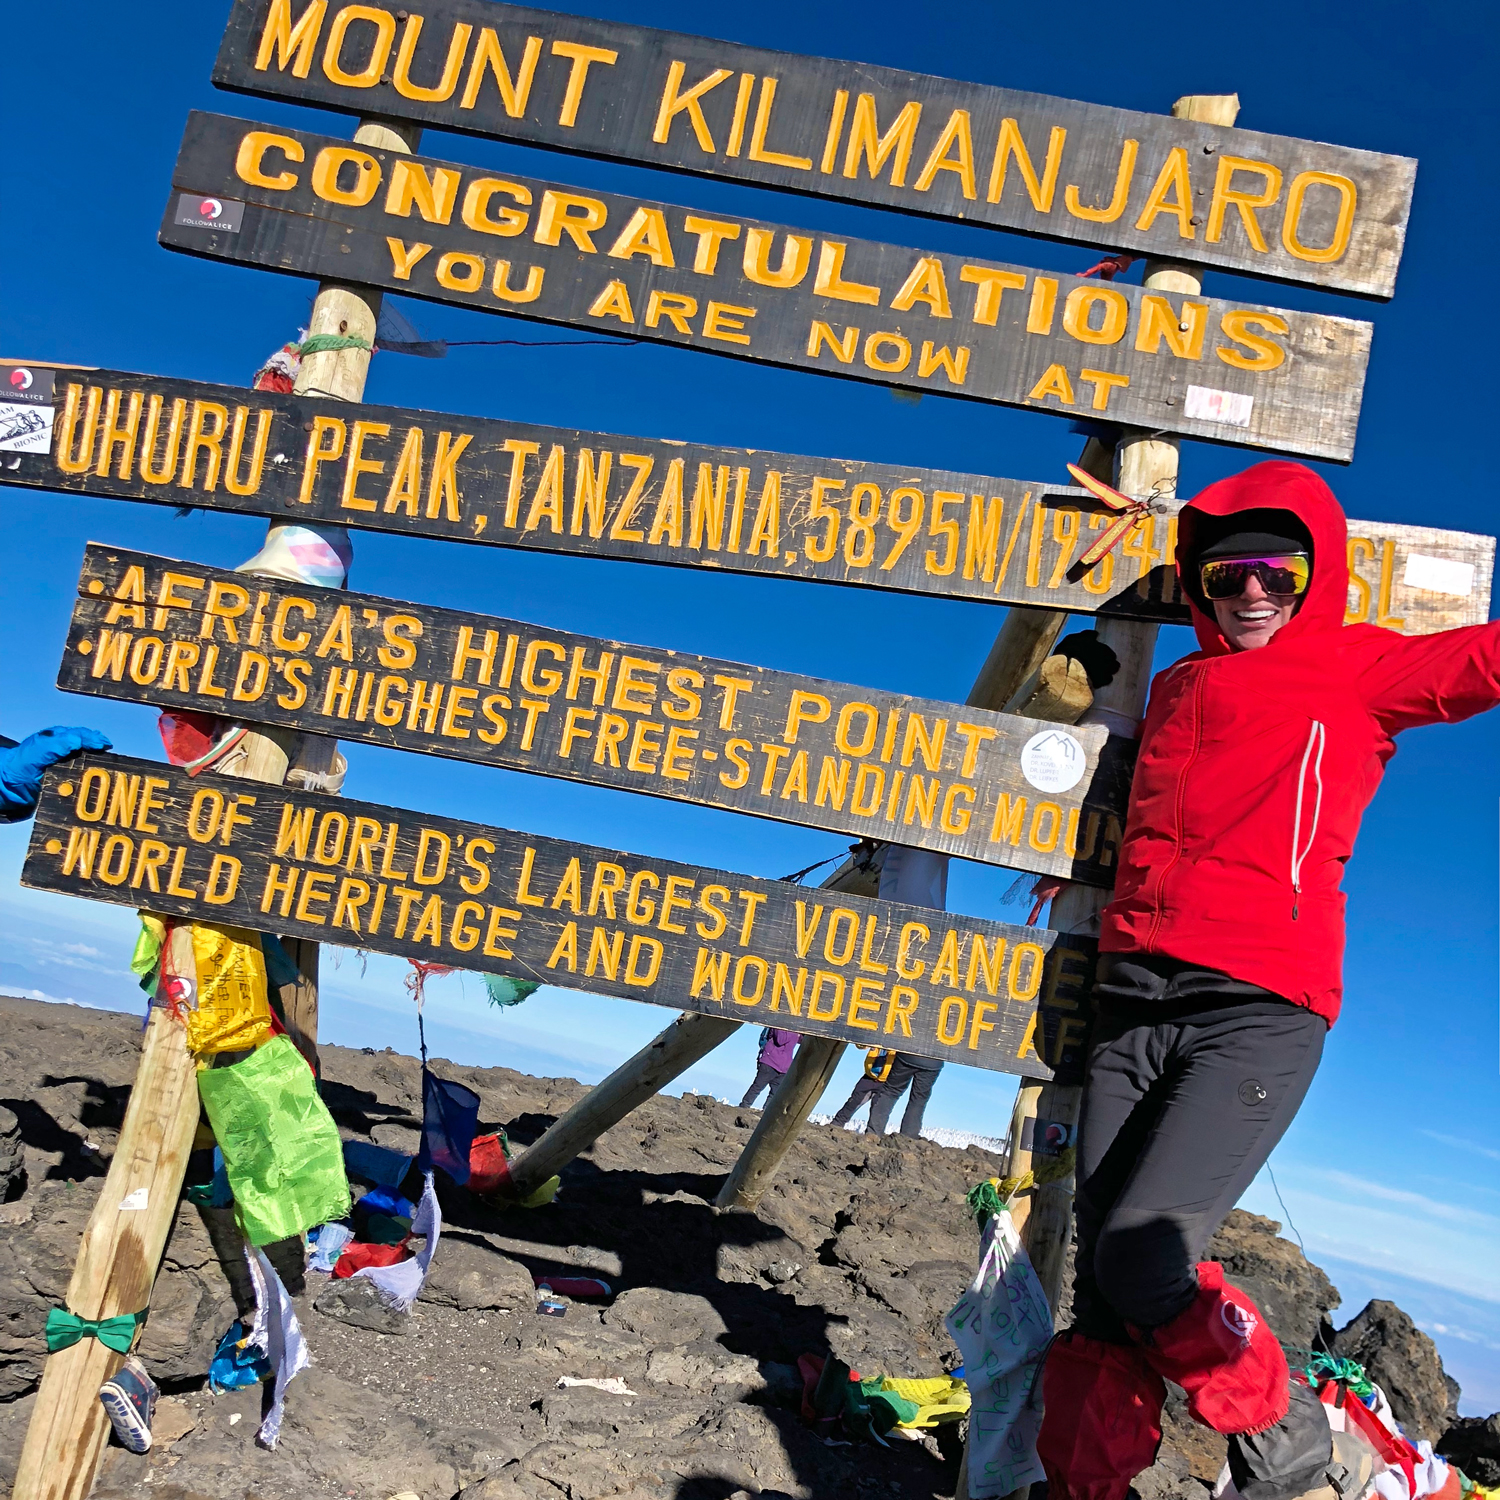
Kilimanjaro has seven trails (six of which are usually offered by trekking companies), and each one has its advantages and disadvantages. I chose the Lemosho route because it is considered the most beautiful route and offers the best acclimatization options. It also has the highest success rate of trekkers who reached the summit. The Lemosho route is quickly becoming one of the more popular routes, up there with the Machame route (they actually meet up at the Lava Tower). It is a bit more expensive than other routes, and lasts a few more days. However, you get what you pay for and more days offer a better chance to reach Uhuru Peak.
Now, I don’t know much about the other routes. I can tell you that I have heard a lot of negative things about the traditional Marangu Route. Many companies offer this route at a cheap price, and that is part of the allure, especially for first-time trekkers. Another reason why people choose it is because they can sleep in huts, and it is traditionally offered as a quick 5 day, 4 night trek. This is really bad for acclimatization, and thus many people who use this route are at a higher risk for developing altitude sickness.
For a lot of people, choosing which route to take is a difficult decision. I advise to really look at each route and talk to your tour operators to help you decide which one is best for you, and which one will offer you the best chance to summit.
Pole Pole
“Pole pole.” Go slowly. I can’t even count how many times I heard this phrase. I also can’t even count how many times I wanted to just leave pole pole behind and book it to the next campsite. I am used to hiking at a relatively fast pace (my friends all jokingly refer to me as the “mountain goat”) and have ADHD. So pole pole did not come naturally to me. In fact, it was hard. But, it helped me stay in the moment and focus on my goals. It helped me calm my body, mind and ego. It helped me acclimatize at the right pace and summit. (Your body works a lot harder at altitude, even if you don’t “feel it”). It placed even more trust in the guides and myself. Believe me, I don’t think I would have had my success or no signs of altitude sickness without going at that pace. Put your ego and impatience away and enjoy the view. Slowly.
Listen to Your Body
Always listen to your body when it is telling you something. If you start to get headaches, stomach aches or any signs of altitude sickness, let your guides know. They may advise you to go slower, get rest, eat more or drink more water. They may give you some Advil or Diamox. If your symptoms are really bad, they may want you to take another day to acclimatize or they may want you to descend.
Know what symptoms to look for, and always seek help if you are feeling ill. There are three forms of altitude sickness:
Acute Mountain Sickness (AMS): AMS is actually pretty common, since most people live around sea level and are not exposed to the effects of altitude. Symptoms include headache, shortness of breath, fatigue, loss of appetite, muscle aches and sometimes dizziness. Some people compare this to a hangover. If you have these symptoms alert your guides and determine a course of action.
High Altitude Pulmonary Edema (HAPE): HAPE is caused by excess amount of fluid in the lungs, and can occur at altitudes over 8,000 feet. Symptoms include extreme shortness of breath, headache, rapid heartbeat, restlessness, clammy skin, gasping for breath, fever and a heavy cough. This can be deadly. If you have these symptoms you will need to descent to lower elevation and seek medical attention.
High Altitude Cerebral Edema (HACE): HACE, caused by excess amount of fluid in the brain, is the most severe form of altitude sickness and can be deadly if left untreated. Symptoms include disorientation or altered mental state, feeling lethargic, nausea, rapid heart beat, sever headache and sometimes loss of consciousness. Descend immediately and seek medical attention.
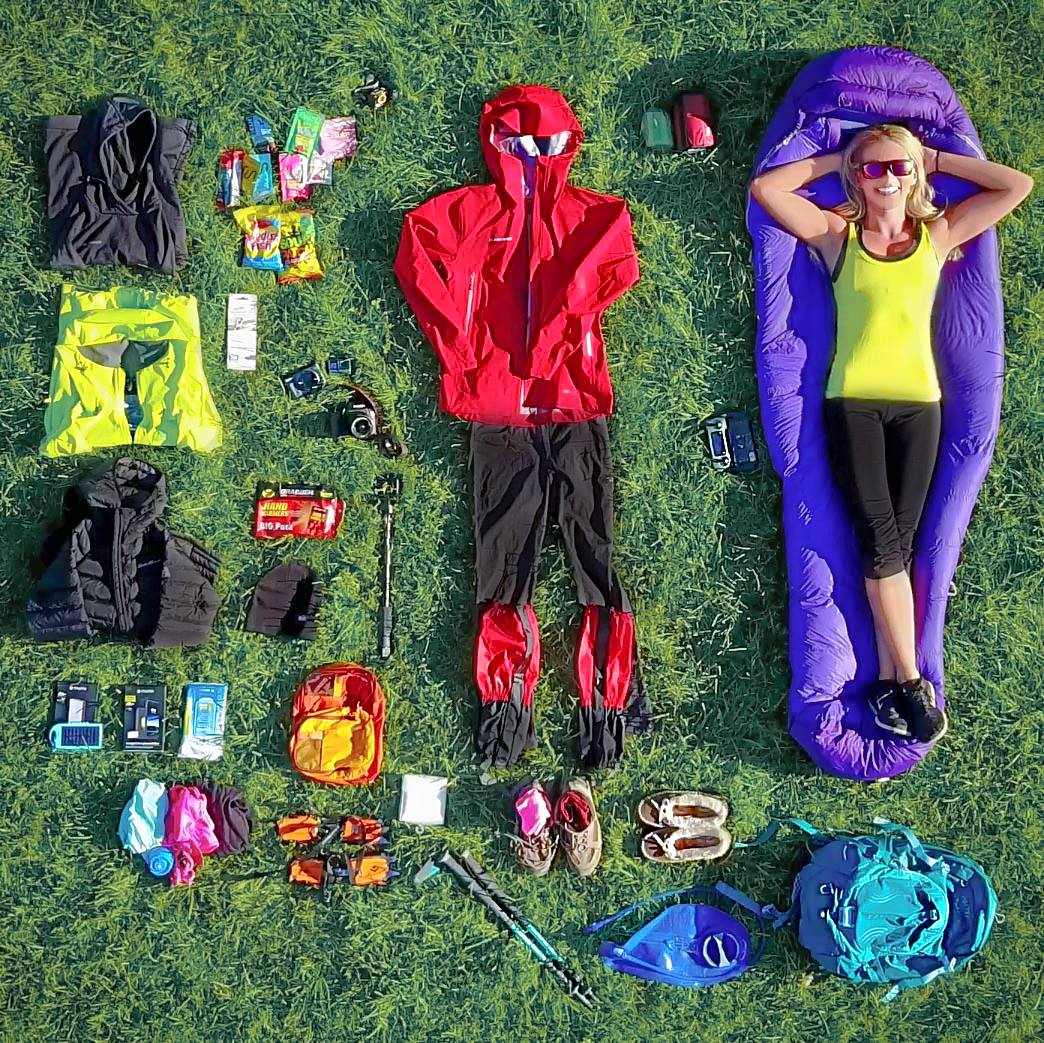
Pack Right and Pack Light
Overpacking is still a serious problem of mine, so when I pack for treks I really try to be mindful and only pack what I really need. I made sure that I had enough underwear and socks for each day, as having a clean pair of both really makes the trip better. Make sure that whatever you pack, it is good quality. This can seriously make or break your trip, especially at higher altitudes or in crappy weather. Make sure you also don’t bring too many clothes, as you only have so much room in your day pack and porter bag. You will need to rely on layering your clothes as you trek through different ecosystems and encounter different weather patterns, but more on that in the next tip.
Here is a list of what I brought:
- 7 pairs of underwear and socks
- 2 pairs of thick wool socks
- 2 tank tops and 2 long moisture wicking sleeve shirts (thermals)
- 1 pair of yoga pants, 2 pairs of thermal pants and 1 pair of fleece pants
- 1 fleece jacket, 1 light down jacket and 1 light rain jacket
- 1 waterproof and windproof outer layer jacket
- 1 pair of water proof and windproof outer layer pants
- 1 pair of hiking boots and 1 pair of runners for camp
- 1 poncho (always keep this in your day pack)
- 1 hat, 2 buffs, 1 beanie and 1 balaclava
- 1 pair of gaiters
Layer Up
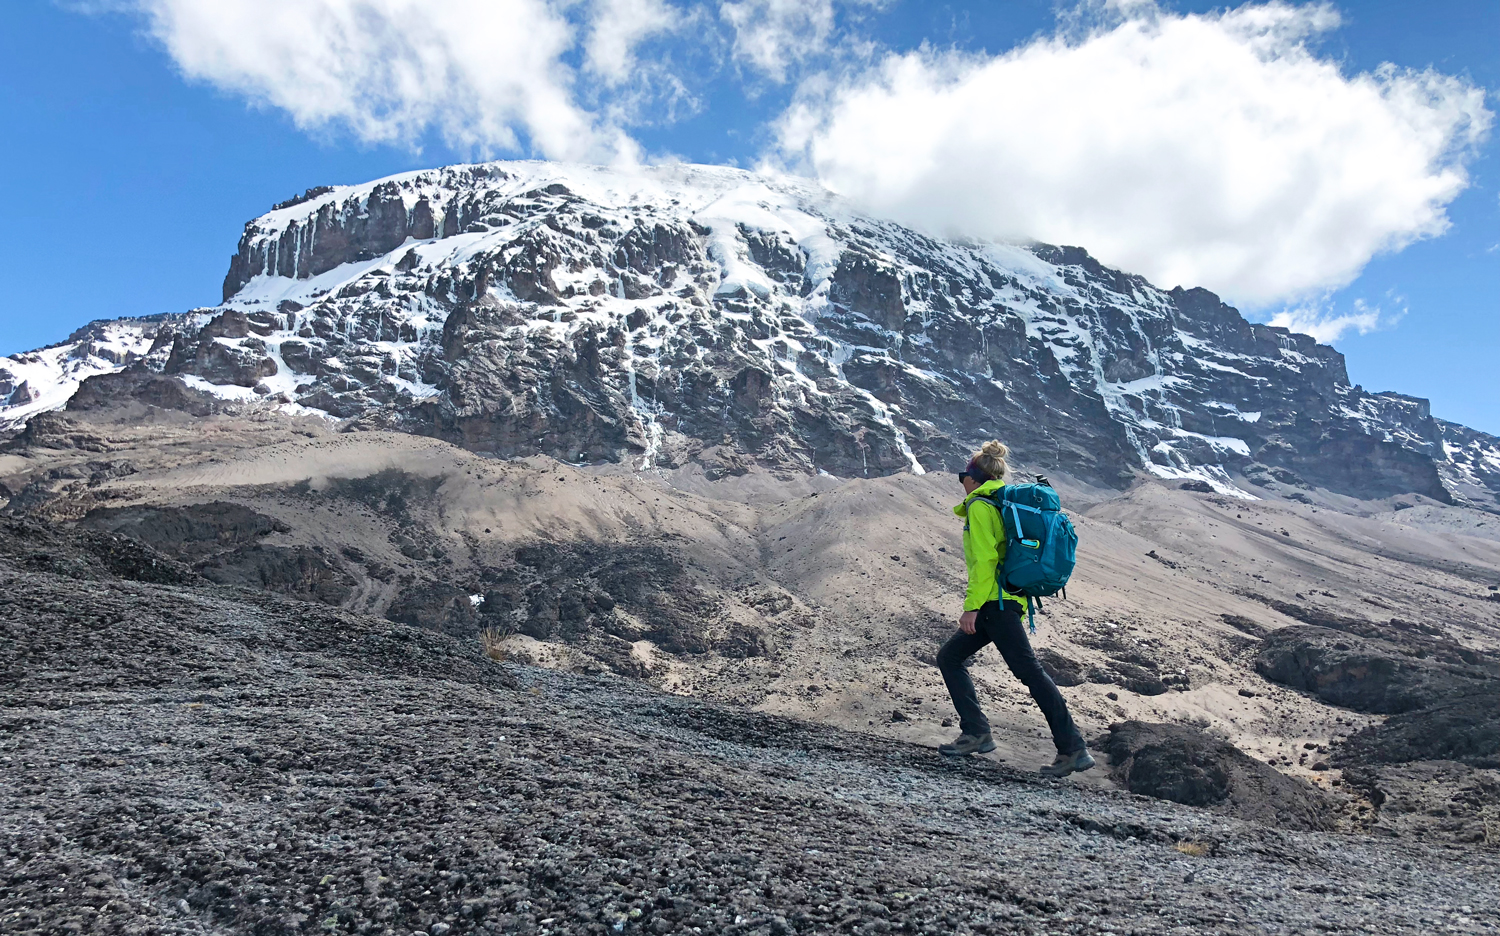
You will be trekking through five ecosystems and various changes in weather on the mountain, so layering is key to ensuring that you are comfortable and prepared during your climb. It is not uncommon to experience all four seasons in a day, so bring some layers in your daypack. Most days I wore a tank top or thermal shirt, light down jacket (that got taken off when the sun was bright) and just one pair of pants. We were blessed with almost perfect weather, so my experience may be a bit different than yours. Expect the unexpected and if anything, always have your poncho in your day pack.
Your biggest challenge will be summit night, so be sure to really layer correctly. On summit night I pretty much wore everything: thermal shirt and pants, fleece sweater and pants, down jacket and waterproof and windproof jacket and pants (and then stripped down most layers about half-way down the peak, because it got hot). I also wore my gaiters and my balaclava, because coming down from the summit is extremely dusty.
Know and Break in Your Gear
If nothing else, break in your hiking boots (if they are relatively new), and break them in well before you leave for the mountain. Make sure you have worn your boots on the trails to ensure the perfect fit and level of comfort for Kilimanjaro. You want to make sure your feet are used to hiking in long distances and different terrain in the boots. You want to avoid blisters as much as possible. Before you break in your boots, make sure they fit you correctly. Try them on at the store with thicker wool socks.
You should also have a good pair of trekking poles, especially for the descent. On summit day, the descent is on scree, so the poles come in real handy. Trekking poles are, for most people, a necessity on these treks because they help aid in stability and reduce force on the knees. I highly recommend adjustable and packable poles so you can strap them to your daypack when you aren’t using them. When you do use them, make sure that they put your elbows at a 90 degree angle. Just walk naturally with them, and you will develop a rhythm. I suggest using your poles on hikes or walks before Kilimanjaro.
You will also need a headlamp and extra batteries. Once the sun goes down you will need your headlamp to navigate your way around camp and to see in your sleeping bag. You will also need your headlamp for summit night. I also had a portable camping light for my tent so I could see everything. They come with a carabiner so you can clip it. They illuminate the entire tent, and makes it easier to find things. Bring extra batteries for this as well. Batteries drain faster in altitude.
I also brought crampons, but ended up not needing them. Weather can be crazy on Kilimanjaro, especially at the summit. It is not uncommon to see snow on the mountain, or ice at the summit when temperatures dip. We were so lucky with our weather, but the groups before and after us were not. They encountered snow and ice at the summit. Crampons help minimize the risk of slips and falls on the ice by adding extra traction and grip. I recommend to visit your local mountaineering or outdoors store to get fitted with the best crampons for you and your trek. Learn how to properly fit them to your boots and how to walk in them before using them on the mountain.
I also recommend bringing a solar panel and battery banks to charge your electronics. Make sure the battery banks are fully charged before you head out on the trail. I also brought extra batteries for my point-and-shoot camera and GoPro, just in case the solar panel and battery banks ran out.
Drink at Least 3 Liters of Water a Day
Stay hydrated! Drinking around 3 liters of water a day will keep you hydrated and reduce the risks of altitude sickness. At higher altitudes your body works a lot harder and can get dehydrated at a much quicker rate than at sea level. I highly recommend bringing a hydration bladder that can hold at least 3 liters as well as a water bottle. Having a hydration bladder allows for easier access. Instead of slowing down or stopping to get your water bottle, all you have to do is reach for the hydration hose and drink water. I personally like drinking water from the hose as I hike, as it keeps me in my rhythm and allows me to stay hydrated the entire time. I also recommend brining electrolyte tablets to dissolve in your water because they add flavor to the water and help reduce muscle cramps.
Water Tip: During summit night, your hydration bladder will most likely freeze. Do yourself a favor and bring a few water bottles (at least a liter each). You will need to stay hydrated on the summit bid, as you will be exerting a lot of energy. I took extra precautions and wrapped the water bottles in thick socks with hand warmers inside.
Eat Your Food, Even if You Don’t Feel Hungry
A lot of people started to lose their appetite as we ascended to higher elevations. Even if you don’t feel hungry, my advice to you is to eat as much as you can. Sometimes the guides will even try to force you to eat. At higher altitudes, you burn calories at a much higher rate. If you do not replenish your body with nutrients, you can get very sick and feel weak. You will need all of your energy, nutrients and strength to make the summit, so try to eat as much as you can during each meal or snack break.
Bring Hand Warmers
Hand warmers are such a necessity on Kilimanjaro, especially during summit night. Honestly, the worst part of the summit climb was having cold hands, and I had hand warmers in my gloves! I learned later that hand warmers are a little less effective in altitude, so that could have played a part. Still, they helped a lot. I would also suggest bringing mountaineering gloves or mittens as well. Layer up!
I also learned this trick out in the Canadian Rockies: use your hand warmers for your phone and camera. I was getting really fed up with my phone and camera batteries losing power in the cold, and met a few snowshoers who told me they keep theirs powered up by wrapping them in hand warmers. So now, I buy those bad boys in bulk.

Climb High, Sleep Low
Another way to reduce the risks and impacts of altitude sickness is to climb high and sleep low. Most of the longer treks obey this rule. Even on the “easier days,” if you feel well, make sure you always go on the acclimatization hikes. yes rest is important, but so is acclimatization. These acclimatization hikes ensure that you are getting the right amount of exposure to altitude before you go to sleep. Use them.
Invest in a Toilet Tent
A lot of people ask me if the toilet tent was worth the extra cost. My response every time: a resounding “HELL YES!” The best thing I did in Moshi was get the toilet tent. Trust me, nights on the mountain are cold. And dark. Trying to find a place to use the bathroom would have been so miserable. This tent was right near my own tent (I shared it with 3 other people), and was actually a toilet. You could sit on it (clean it first – advice from a germaphobe). It was glorious.
Ensure You Get a Good Sleep
You will most likely be exhausted once you get to camp. But I am here to remind you why it is imperative that you get lots of sleep. We always went to bed before 9 pm because we were tired, full and had to wake up at 6 am most mornings. Getting a good night’s sleep will help restore your body and mind for the next day. It can be noisy at the campsite, so I also highly recommend bringing earplugs.
Learn Some Swahili Phrases
Using a few Swahili phrases are sure to put a smile on the faces of your guides and porters. It also shows that you respect and want to learn more about their culture. It’s the least you can do for the people who are responsible for helping you reach the summit. I also recommend talking to them and learning their stories. Our guides were some of the most interesting people I have met on my travels, and it was such an honor to get to know them.
Here are some useful phrases:
Jambo! – Hello!
Pole Pole – Slowly, slowly. You will hear this so many times on the trail. Going slowly will help your body acclimate and give you a better success rate of reaching the summit. Also, it’s a way of life. Literally everything in Tanzania was pole pole.
Asante Sana – Thank you very much.
Karibu Sana – You’re welcome.
Twende! – Let’s go! You’ll hear this a lot if you’re taking long breaks.
Hakuna Matata – No worries. It’s a mindset. It’s a lifestyle. Embrace it.
Take the Diamox (It’s NOT Cheating)
Most of the people on our trek took Diamox every day. Personally, because I am used to hiking in high altitude, I waited until I reached 15,000 feet. However, I advise you to discuss this with your doctor, and not to take my word for it. I took half a dose the night of day five and the morning and night of summit day.
I will warn you. Diamox is a diuretic, which means it increases the rate in which you pee. Drink even more water than you usually do, even thought you may be fed up with going to the bathroom all the time. This is to replenish what you lost and to keep you hydrated. You may feel a tingling sensation (pins and needles) in your hands and feet as well. Especially at night, when you are trying to sleep. It’s very annoying. However, I’ll take those symptoms over altitude sickness any day.
Arrive Early to Avoid Jet Lag
From the Kilimanjaro airport, tourists either stay in Moshi or Arusha before and after their trek (I stayed in Moshi). Although I met a large number of people who began the trek just a day after they arrived, I highly recommend booking a few nights before the trek to get your body used to the new time zone and to avoid jet lag on the trail. You want your body and mind to be in peak condition on the trail, and the last thing you need is to feel tired.
Wear Sunglasses and Apply LOTS of Sunscreen
The sun is strong on Kilimanjaro, and it gets stronger as you gain elevation (or encounter snow). Kilimanjaro is also located near the equator, which means the sun’s rays are even stronger. Load up on SPF; you won’t want to deal with a bad sunburn on this trail.
Bring Your Favorite Snacks
I love bringing candy and snacks from home to the trail. Some of my favorites are Swedish Fish, Sour Patch Kids Watermelons and Jelly Belly jelly beans. I also always bring CLIF bars and blocks, which contain protein and electrolytes. You burn so much energy on the trail, and it’s always a treat to have some candy during a snack break. As well, it’s been shown that most people will snack on candy, granola bars or trail mix even if they don’t have much of an appetite. And, most importantly, it’s a great way to make (and keep) friends!
Don’t Bring a Big Camera
I made that mistake on the Inca Trail, and it really weighed me down. For Kilimanjaro, I brought my iPhone, GoPro and Canon Powershot (link and model). They all take great photos, and I edit them after anyways. This way, all of my cameras were easy to access and my day pack was much lighter. Remember, you want to keep your day pack as light as possible. Wearing a heavier backpack will result in a higher exertion of energy.
Whatever you bring, take lots of photos!
Be the Positive Person in the Group
Even if it gets annoying. Be the motivation for yourself and the other members of your trekking group. I have earned the nickname “smiley” on my treks because I am always smiling, happy and cheering people on. I have also annoyed some people in the process, as high altitude and lots of exercise can make people grumpy. However, this does not deter me. I am a firm believer in enjoying and celebrating every moment and smiling in the process.
Stay in the Moment
It’s so hard to stay present when there are seemingly big obstacles in front of you (the ever looming Uhuru Peak). I assure you, as hard as it may be, staying in the moment will allow you to see the beauty in each day, in each passing moment.
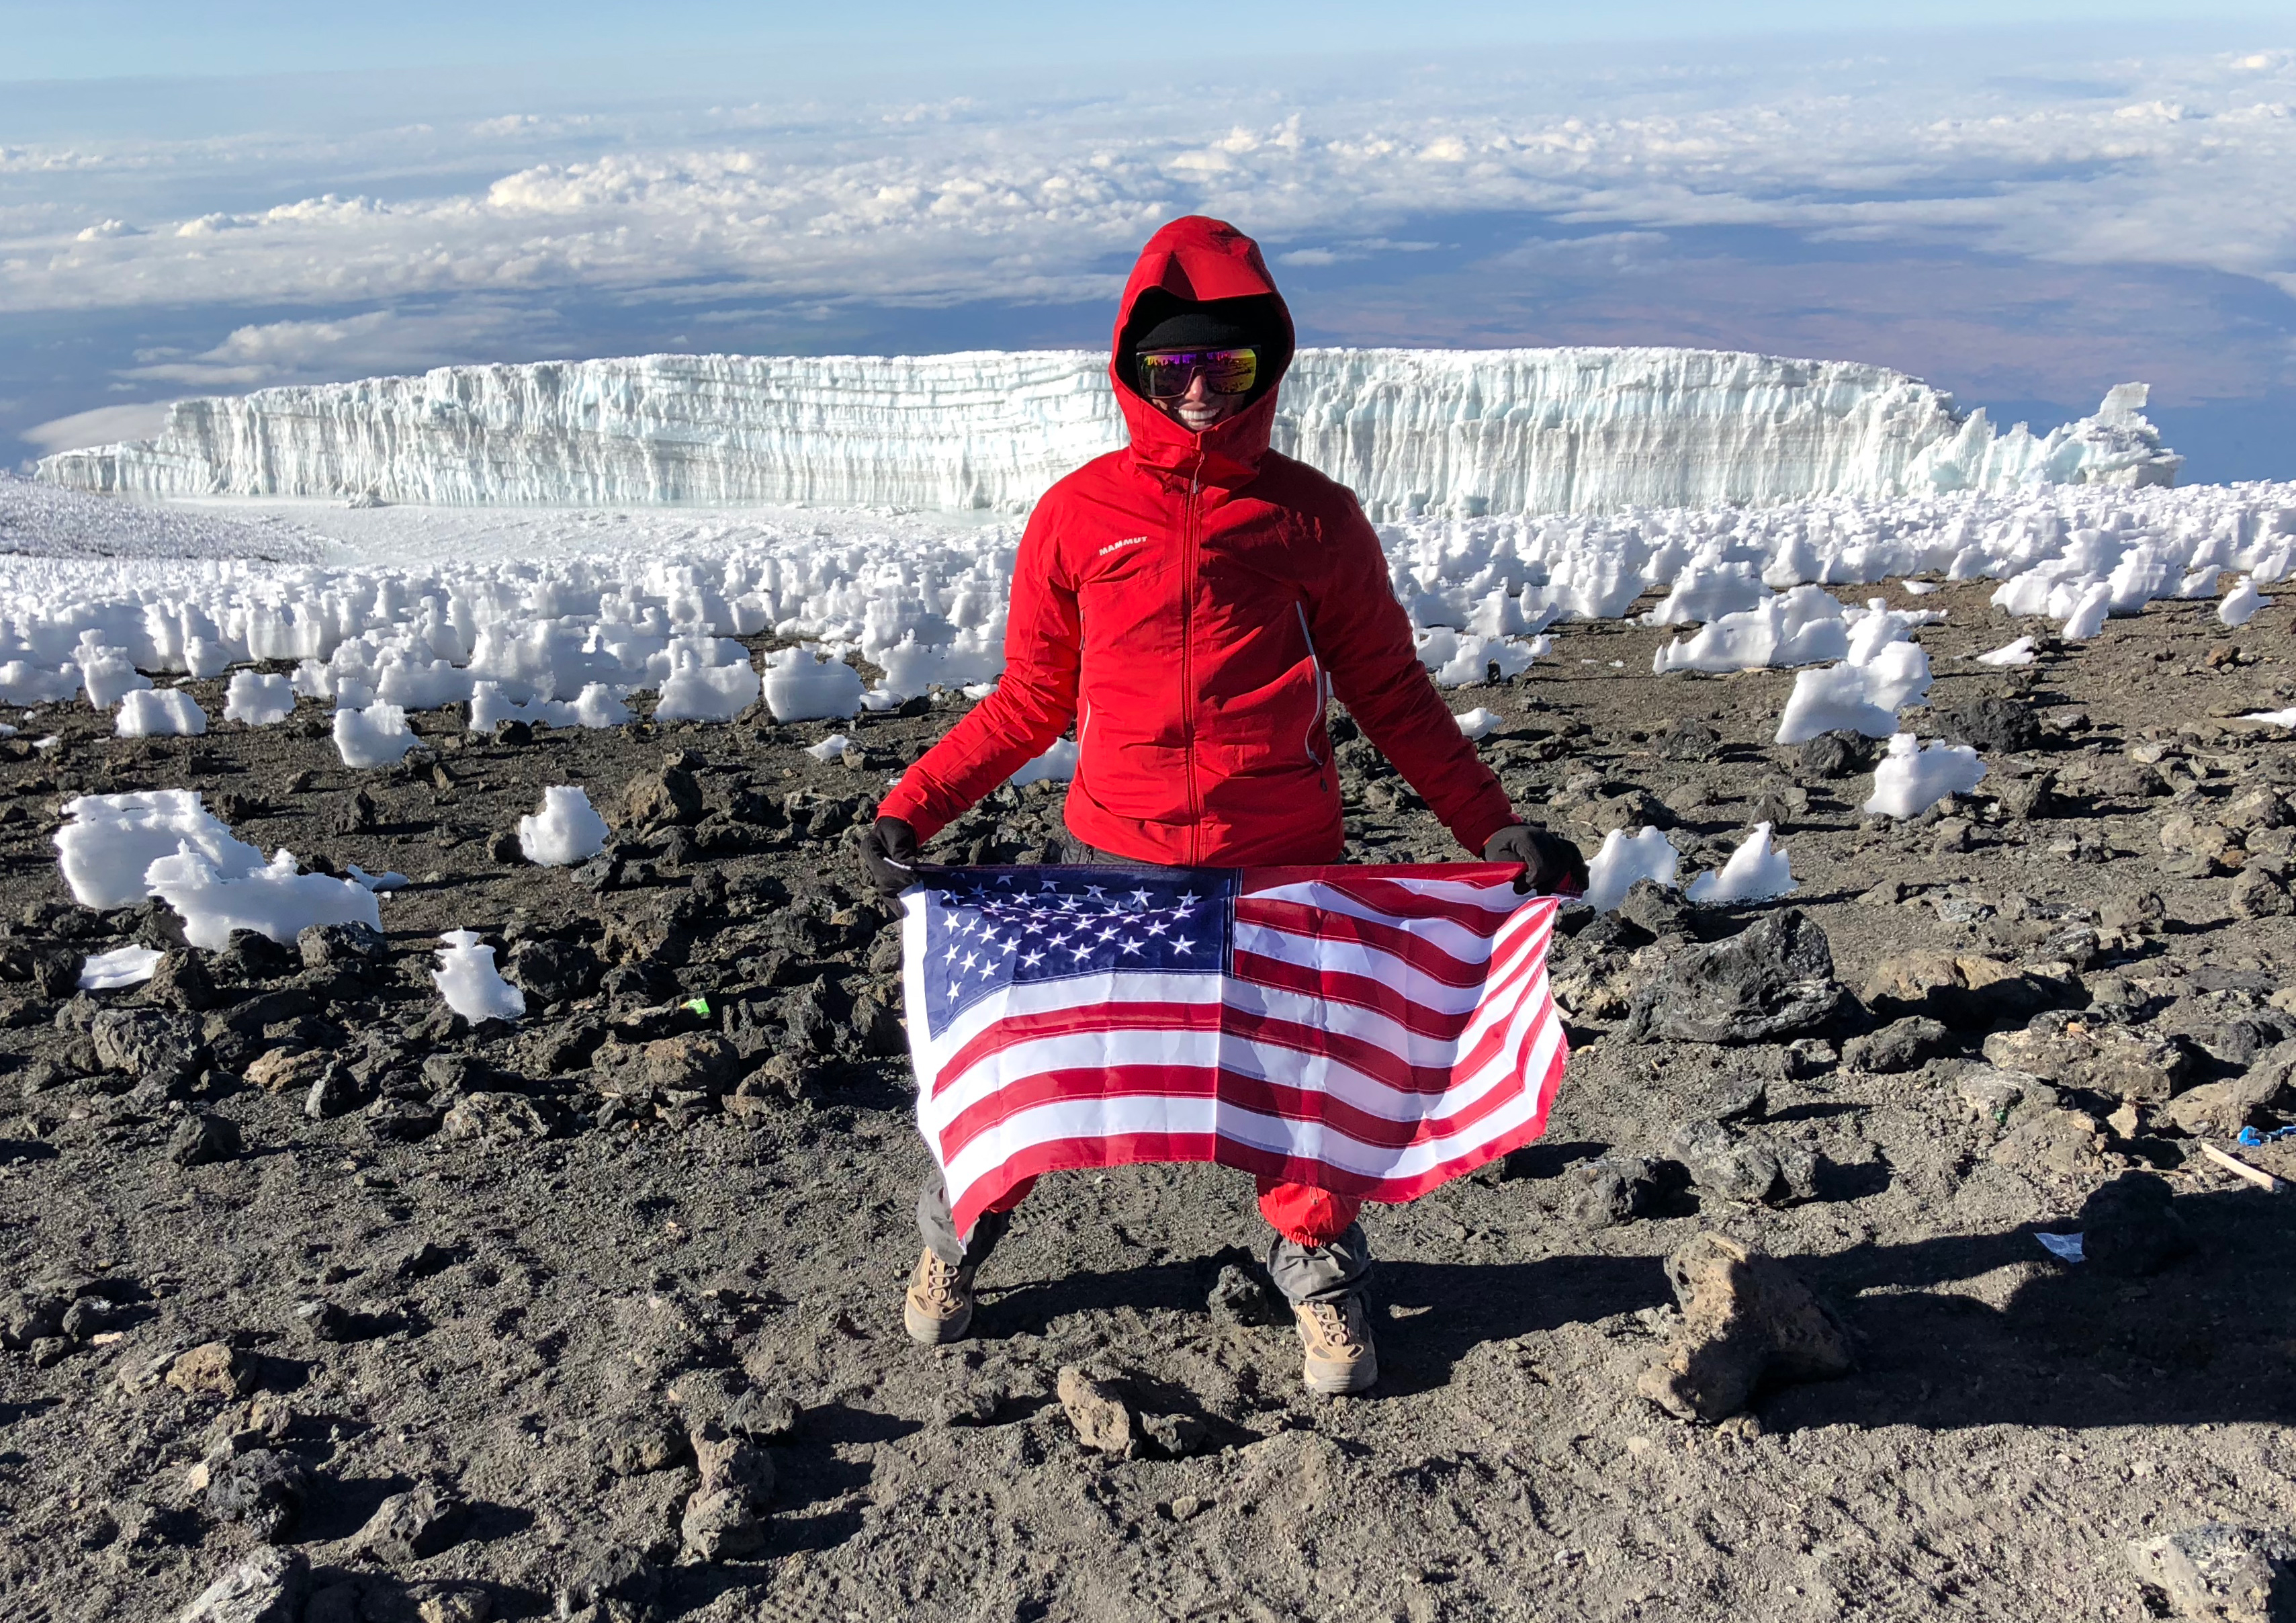
Bring Something of Value With You
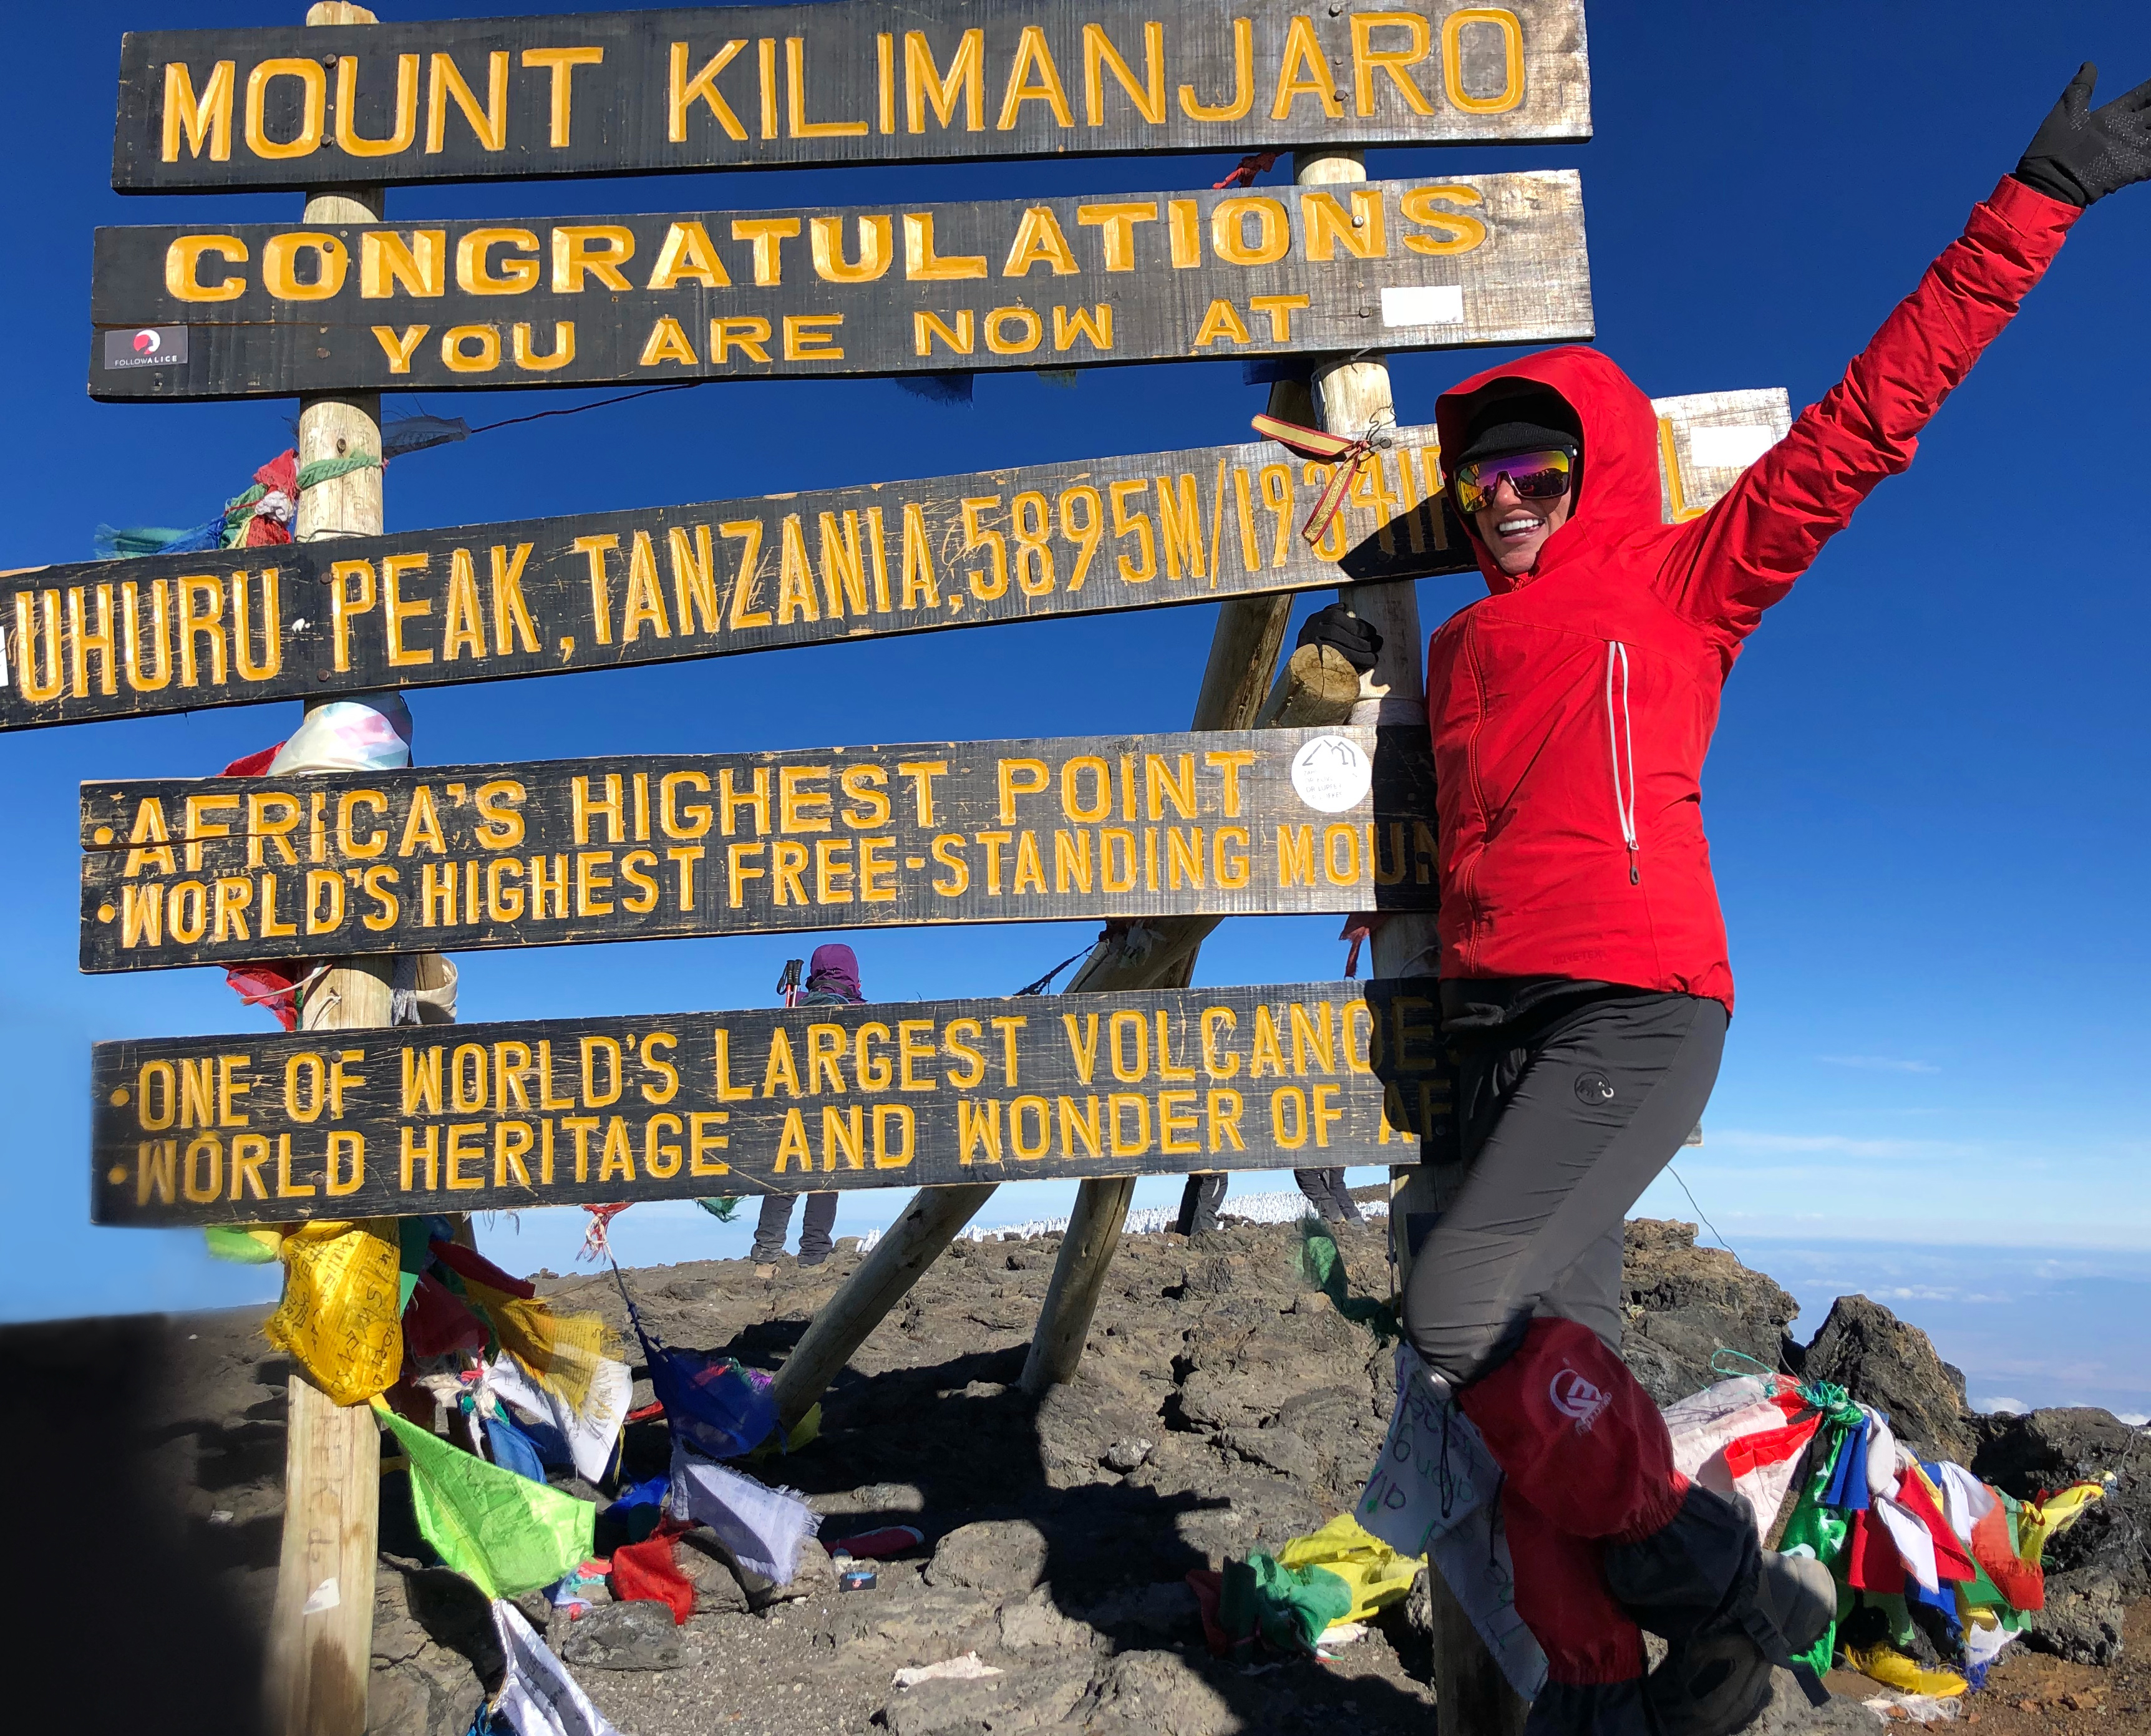
I brought an American flag in honor of my grandfather, who was in the military. Years ago, he shared his story with me about how he climbed Kilimanjaro, but had to turn back below the summit due to altitude sickness. When he died, I told myself I would reach the summit in his honor. Having the flag with me made me even more determined to reach Uhuru Peak.
I think having that flag gave me even more motivation to reach the summit. It gave the trek a larger purpose. I suggest bringing something with you that has meaning and bring it with you. It will be there with you every step of the way.
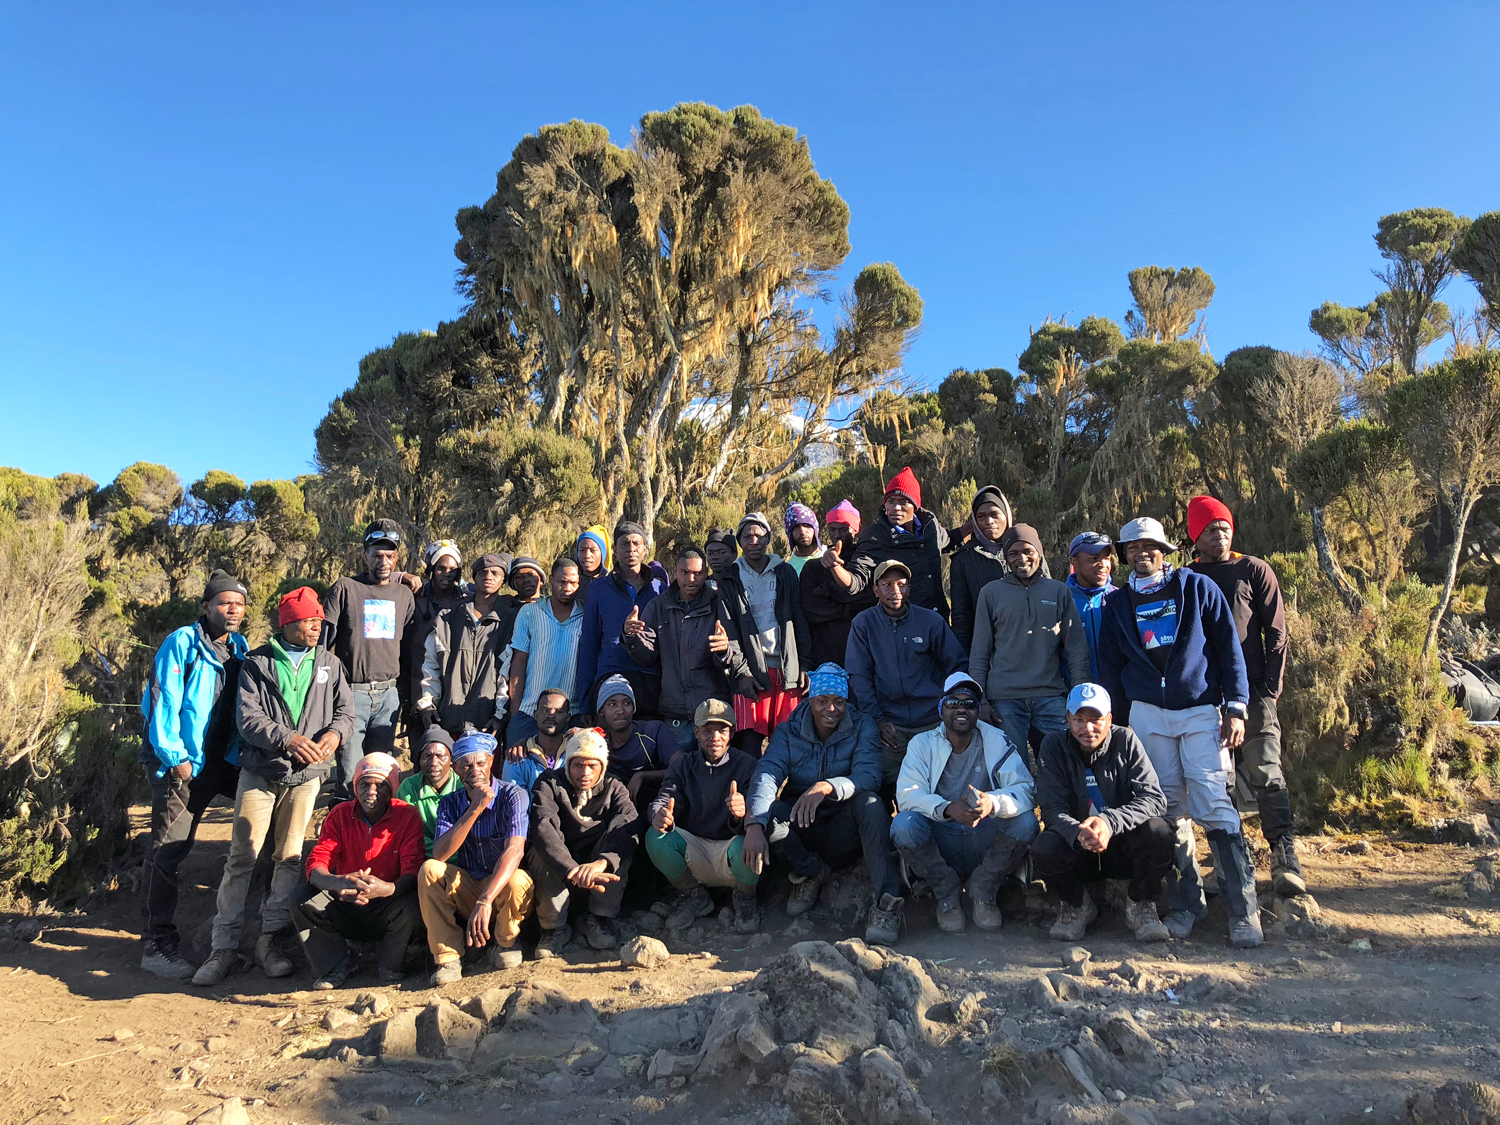
Tip Your Guides, Porters and Cooks Well
It really does take a village. Without your team of guides, porters and cooks, it would be extremely difficult to make it to the summit. Almost impossible. These people are responsible for getting you up the mountain, feeding you delicious food, ensuring you are healthy and safe, carrying your gear and setting up and taking down your tents. They work hard. It is truly humbling (and a bit heartbreaking) to watch them carry your large bags up the mountain. And they work with such a positive attitude. Everyone on our team had a smile on their face. I cannot tell you how happy it made me to hear the enthusiasm in their voices when they told me “good morning” or that “dinner is ready my friend.” Their love of the mountain is also contagious. Ask them lots of questions; they are knowledgable and passionate about what they do. A lot of them also have families and are working to support them. Your tips go a long way.
TIP: Only go with a company that is KPAP approved. KPAP stands for Kilimanjaro Porters Assistance Project, and this organization makes sure that the porters used are paid a fair wage, given appropriate gear and clothing to wear and are fed well during the trek. There are companies out there that do not pay porters well or even feed them enough food. That truly breaks my heart. Please make sure to do your research to make sure your porters are treated like a human being.
Leave No Trace
The last thing I want to see on any trail is garbage. Please take out what you bring in. If you see trash, maybe pick some up.
Celebrate Your Small Victories
Before Kilimanjaro I had never been above 15,000 feet. So when I reached 15,000 feet on the trek everything after was my new personal record. I found that by viewing each step after that as a record helped me stay in the moment and celebrate small victories. Create small goals and crush them. Then crush your ultimate goal, the summit!
Visualize the Summit and Never Give Up
I firmly believe that visualizing your goals, whatever they may be, really helps to achieve them. Constantly visualizing yourself standing at the summit of Kilimanjaro with a big smile on your face will help you to mentally prepare for the journey. It helps in your concentration and confidence in yourself. It helps to get rid of the anxiety and fears you may have. It also helps to eradicate self-doubt. Never stop believing in your goals and yourself.
Remember: It’s About the Journey
Take each day as it is. Live in the moment. Every day here is an incredible journey in and of itself. Every day presents different landscapes, climate zones, obstacles, challenges and opportunities to grow. Some people don’t summit, and that’s ok. Don’t get hung up on just making the summit. Of course, you should always aim to make the summit, and strive to everyday. But don’t let your dreams of making the summit cloud the whole experience. Don’t miss out on a single moment. Cherish every moment, and make memories that will impact your for the rest of your life.

Founder and main contributor to This Adventure Life, Kirsten Alexis has passion for all things adventure and the outdoors. She is an avid participant in action sports, such as skydiving, paragliding, snowboarding, high-altitude trekking, mountain biking, surfing and more. She is passionate about inspiring others to live their wildest dreams as well as conserving the environment for others to enjoy for years to come.
Comments
Thanks Kirsten! This is very helpful. I’m planning to do it in August next year.
Oh wow!!! I’m so excited that you plan to climb Kilimanjaro!! I hope to hear all about it! Let me know if you have any questions!!! 🙂
You are going to love it!!! If you have any questions feel free to ask!